Got Kyra almost completely base coated and finished the front piece of the saddle.
Showing posts with label WIP. Show all posts
20131117
20130819
Kyra and Lavarath WIP Part 3
Couldn't sleep so got up and slapped some MSP Honed Steel on Lavarath's armor. Pics could be better, but photographing metallic paint is tough enough with a regular camera and the light tent set up let alone with a phone camera and bare lights.
Starting to look pretty cool if I do say so myself.
20130805
Kyra and Lavarath WIP part 2
Here's the pic of today's work. Have just a little bit of the tan left to do, then clean up the edges between it and green. Then probably leather straps and buckles next. Trying to decide what color to use for the inside of the mouth.
20120812
Hunter Assembly
After a learning game of Munchkin (been a long time since I played and they never had) at a friend's house came home and started to work on the Northern GP squad. Right now all five have everything except their arms and primary weapons assembled. I'm going to paint the arms and weapons separate in order to keep them out of the way while I paint the torsos, pretty much the same way I paint my other mecha figs.
The most common thought I had tonight was, "Is that detail or a mold line?" Which isn't unusual when I'm working with figures I've never seen before. However, the problem was compounded when I discovered the metal Dream Pod 9 uses is much softer than what I'm used to. So the first pass with a file got a lot more pressure than was needed and I'm sure I'll probably anger some WYSWIYG purist out there for having accidentally filed off the interior left repair access panel or some such. Otherwise though the casting was overall good, despite a tendency to have some pitting on flat surfaces. Thankfully those those were all at points that would be covered when glued together. Assembly was fairly straight forward. Fit is a bit loose, but not overly so. I have a feeling I should have pinned them, but the kids broke the drill bit I use for that and I can't seem to find the right size without having to buy a whole set of bits. Probably about the only thing I had some issue as far as assembly goes was that I filed the mount on the back of the torso for the V-Engine "backpack" down too far while cleaning up molding irregularities and I'm not real comfortable with the resulting join.
Tomorrow should see preparation of the arms and weapons, priming, and maybe even a little paint. Something I'm already not too sure about though is where exactly the Heavy Panzerfaust is supposed to go...
The most common thought I had tonight was, "Is that detail or a mold line?" Which isn't unusual when I'm working with figures I've never seen before. However, the problem was compounded when I discovered the metal Dream Pod 9 uses is much softer than what I'm used to. So the first pass with a file got a lot more pressure than was needed and I'm sure I'll probably anger some WYSWIYG purist out there for having accidentally filed off the interior left repair access panel or some such. Otherwise though the casting was overall good, despite a tendency to have some pitting on flat surfaces. Thankfully those those were all at points that would be covered when glued together. Assembly was fairly straight forward. Fit is a bit loose, but not overly so. I have a feeling I should have pinned them, but the kids broke the drill bit I use for that and I can't seem to find the right size without having to buy a whole set of bits. Probably about the only thing I had some issue as far as assembly goes was that I filed the mount on the back of the torso for the V-Engine "backpack" down too far while cleaning up molding irregularities and I'm not real comfortable with the resulting join.
Tomorrow should see preparation of the arms and weapons, priming, and maybe even a little paint. Something I'm already not too sure about though is where exactly the Heavy Panzerfaust is supposed to go...
20120414
Shield Generator/Power Plant WIP
Today I finally got around to starting a terrain piece that's been floating around my bitz bucket for a while now. At some point last year my kids had left a Hubba Bubba Bubble Tape container on the floor. I saw it and had an attack of Scratchbuilditis, as I knew instantly what that little container really wanted to be when it grew up. Not too long later the kids had left another empty one in the van. Only problem was I needed something to dress it up. A few weeks ago I saw the cover for one of my wife's disposable razors and it looked the part, so I looked around for a second. Wait about six months, and today I finally got off my butt and started on it.
Here's the parts:
2 bubble tape containers, 2 ladies disposable razor covers, and the base is a wood flat from Michael's (Hobby Lobby has them as well, I'm sure most general craft stores will).
First step was to separate the halves and trim the bottoms so they'd sit flat. I used a combination of hobby saw and X-Acto knife for this. After that, removing the stickers. Getting the sticker glue off was a real pain in the ass though that resulted in me getting a blister on the side of my thumb.
Test fit
Next was to scratch up the sides to be glued together with some 80 grit sandpaper so there is some tooth to the surfaces to be glued. The plastic on the side is extremely smooth and non-porous. Had to do the same with the area that the razor covers were attached as well. Superglue (your typical cyanoacrylic glue) was what I used. I glued them together in sets of two them together, starting to look like something now...
Another project that had been sitting around, a little something to pass the time while glue dries.
All glued together now. I used some regular Milliput (found it at Hobby Lobby) to fill in the openings where the gum strip used to come out. I've decided I really like Milliput for it's ability to be smoothed with the application of a little water. Greenstuff and I have never really gotten along all that well. Had a little extra over so tried my hand at making some vent panels. Only one of the two turned out semi-OK-ish enough to use.
Since I wasn't sure what kind of plastic it was, I used Krylon Fusion black spray paint to cover the model as sometimes I've done work with plastic that went all tacky on me due to interactions between the plastic and the clear coat. Hopefully the Fusion coat will help prevent that. I'm going to let the base coat dry overnight then I'll glue it to the base and smear some artist's gel to the base and prime the whole thing with my usual primer (Duplicolor sandable auto primer - usually in grey rather than white or black). It looks good in black, but I know that it hasn't reached it's full potential yet.
Thoughts on painting are metallic silver with a good dark wash and glowing blue in the recesses along the tops. I'm purposely trying to avoid anything that will give this piece a scale reference to increase it's potential for use. Right now I'm looking at is as a shield generator or power plant for 6mm to 15mm and as a small power plant for 28mm or maybe a part of a Cygnar research project for Warmachine (though I still have yet to play that particular game). I'm hoping to get it based and primed tomorrow, maybe even a little paint. Though to be honest I'd like to play the last game of the Klingon Armada campaign tomorrow as well.
Here's the parts:
2 bubble tape containers, 2 ladies disposable razor covers, and the base is a wood flat from Michael's (Hobby Lobby has them as well, I'm sure most general craft stores will).
First step was to separate the halves and trim the bottoms so they'd sit flat. I used a combination of hobby saw and X-Acto knife for this. After that, removing the stickers. Getting the sticker glue off was a real pain in the ass though that resulted in me getting a blister on the side of my thumb.
Test fit
Next was to scratch up the sides to be glued together with some 80 grit sandpaper so there is some tooth to the surfaces to be glued. The plastic on the side is extremely smooth and non-porous. Had to do the same with the area that the razor covers were attached as well. Superglue (your typical cyanoacrylic glue) was what I used. I glued them together in sets of two them together, starting to look like something now...
Another project that had been sitting around, a little something to pass the time while glue dries.
All glued together now. I used some regular Milliput (found it at Hobby Lobby) to fill in the openings where the gum strip used to come out. I've decided I really like Milliput for it's ability to be smoothed with the application of a little water. Greenstuff and I have never really gotten along all that well. Had a little extra over so tried my hand at making some vent panels. Only one of the two turned out semi-OK-ish enough to use.
Since I wasn't sure what kind of plastic it was, I used Krylon Fusion black spray paint to cover the model as sometimes I've done work with plastic that went all tacky on me due to interactions between the plastic and the clear coat. Hopefully the Fusion coat will help prevent that. I'm going to let the base coat dry overnight then I'll glue it to the base and smear some artist's gel to the base and prime the whole thing with my usual primer (Duplicolor sandable auto primer - usually in grey rather than white or black). It looks good in black, but I know that it hasn't reached it's full potential yet.
Thoughts on painting are metallic silver with a good dark wash and glowing blue in the recesses along the tops. I'm purposely trying to avoid anything that will give this piece a scale reference to increase it's potential for use. Right now I'm looking at is as a shield generator or power plant for 6mm to 15mm and as a small power plant for 28mm or maybe a part of a Cygnar research project for Warmachine (though I still have yet to play that particular game). I'm hoping to get it based and primed tomorrow, maybe even a little paint. Though to be honest I'd like to play the last game of the Klingon Armada campaign tomorrow as well.
20111113
Progress
Got two of the three basecoat colors down on the Lancer. Also have the better part of the Ironclad prepped, though I've decided that from this point forward it'll be paint, then assemble for these models. Too many finicky parts that fit too closely together.
Had some primer issues with pStryker. Whatever you do, do not use Rustoleum auto primer for miniatures, it'll leave a nasty texture all over your figure. Thankfully a few hours in some simple green and a good scrubbing got the offending primer off and allowed me use my normal primer (duplicolor sandable primer).
I'd show some WIP pics, but the blue is very dark right at the moment and wouldn't show up very well.
Had some primer issues with pStryker. Whatever you do, do not use Rustoleum auto primer for miniatures, it'll leave a nasty texture all over your figure. Thankfully a few hours in some simple green and a good scrubbing got the offending primer off and allowed me use my normal primer (duplicolor sandable primer).
I'd show some WIP pics, but the blue is very dark right at the moment and wouldn't show up very well.
20110830
Klingon Incursion
Sunday the boys and I played a game of Klingon Armada. I'm really liking this rules variant for the SFU setting, though I am a bit biased as I also enjoy Starmada: Admiralty Edition which KA is based on.
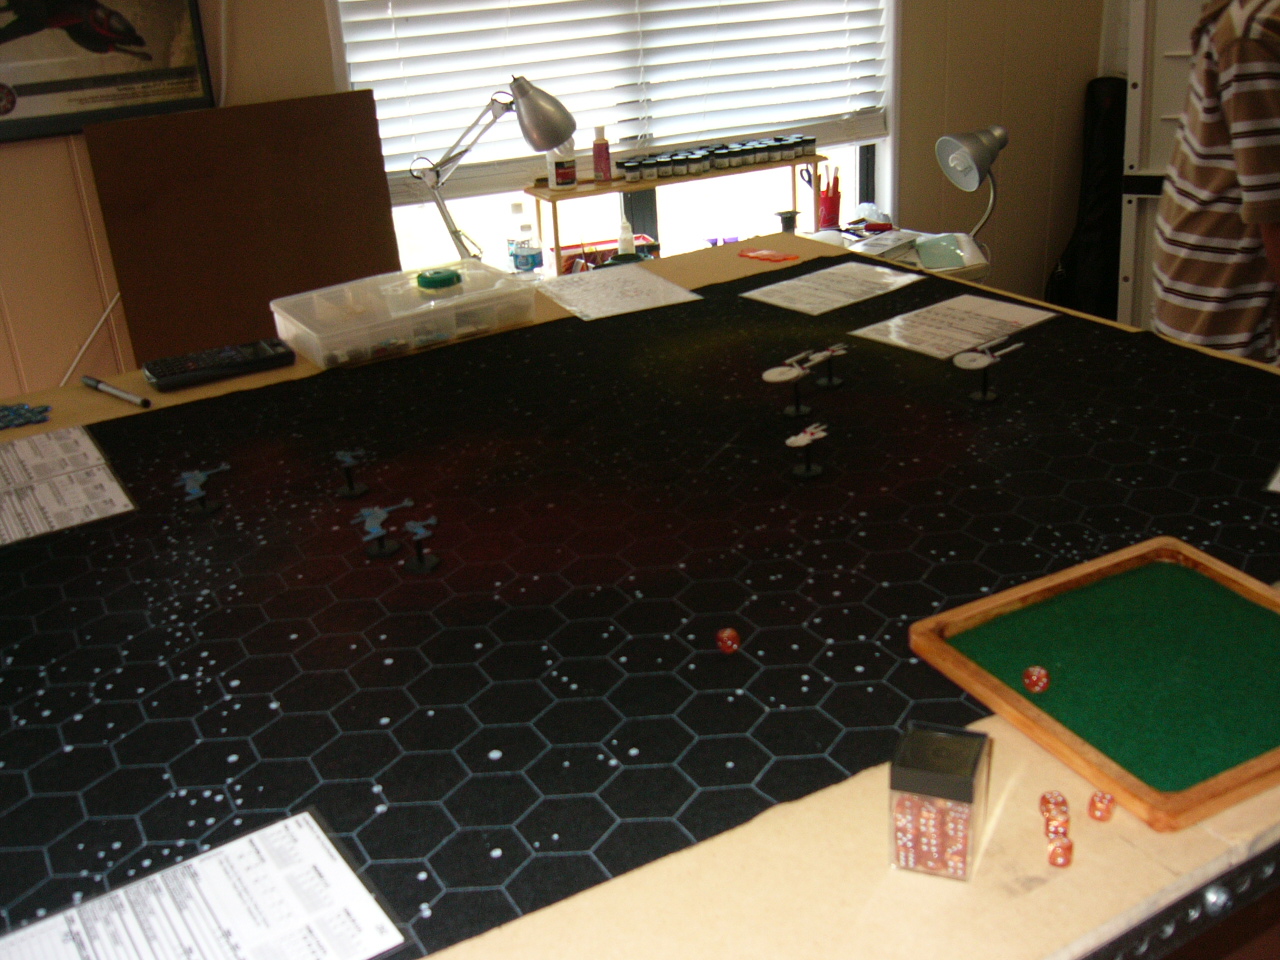
The game was a Federation vs. Klingon 1000pt game (I don't have any of my other SFU ships painted yet..it's only been about four years now). On the Fed side I had a Command Cruiser (CC) represented by the USS Constitution (I know, the Connie isn't a CC, but I don't have a proper CC and the other heavy cruiser doesn't have decals on it so it was the easiest way to distinguish), an as of yet to be named Heavy Cruiser (CA) that we'll imagine for now to be a certain ship that isn't to be named in the SFU, and two Old Light Cruisers (oCL). For the Klingons there were two of the iconic antagonists to the CA...the ever present D7 battlecruiser and two F5 frigates.
RAdm Micheal commanded the CC and an oCL and Capt Zachary commanded the CA and the other oCL. I commanded a D7 and an F5, whilst Phillip commanded the other pair. The first turn was closing and long range phaser-1 shots that amounted to minimal damage, though the CA did lose a number of weapons. Michael advanced his oCL while moving his CC only one hex forward. Zachary was a little more ambitious, moving forward as much as his ships would allow. Phillip, embracing his inner Klingon charged forward while I maneuvered around the edge for a little saber dancing. Phillip fired four drones and I added another one all targeted at the CC.
In the second turn Phillip charged head long into the oncoming cruisers which led to his brothers focusing fire on him. This led to one of the challenging aspects of playing with younger children who haven't developed a sense of sportsmanship yet. He got upset and stormed out because his brothers were obviously being unfair. Though to be honest, they weren't being very sportsmanlike either. This was addressed over the course of the next half hour before we could continue play.Michael advanced each of his ships one hex forward while Zachary cautiously advanced to within overload range. I continued to advance around the edge coming within overloaded disruptor range of Zachary's CA since he had already taken some damage. The drones were a few hexes outside of reaching the CC this turn. Phillip concentrated on Zachary's closer CA and I finished it off (despite some abysmal dice rolls on my part). Michael destroyed Phillip's F5 and put a hurt on his D7. My D7 weathered a few pot shots, but the F5 remained unscathed. In the end phase a new wave of was launched targeting Zachary's CA.
Turn three saw the continued rush of Phillip's D7, which didn't survive the turn. The The drones caused an amount of damage to be expected for five flights against an undamaged CC, though they did a good job of reducing the forward shields. The oCls continued to be pretty much ignored as killing the larger cruisers were sufficient to remove a player from the game from a victory condition point of view (destroy half or more of a player's total point value).
In turn four, I turned to get the CC into a broadside arc and Michael obliged by turning into a head on course to my ships, effectively crossing his own T...with severly depleted forward shields (they were at 1, meaning as long as I rolled a hit it was fairly certain to cause damage). The second wave of drones were spectacularly ineffective, and poor rolling on my part only barely destroyed the CC. However, it was a Pyrrhic victory as overloaded torpedoes rendered my D7 into so much space debris. Had we continued with the oCL and F5, the game would've gone to Michael as the F5 had lost too many weapons to cause any significant damage to the light cruiser. But victory conditions what they were, we called it a tie. (No photo, my chief of photography again ran off, I may need to request another person to fill the billet...)
Even using the simplified movement I think Starmada may be a bit overwhelming for the boys, especially Phillip, but they had fun. I think next time will be a three-way NSL vs FSE vs Mauridians in an effort to use some less complicated shielding rules. Or who knows, I might play a first game of Silent Death, having had that on the shelf for about two and half years now. One thing I do know is that I need to get some F6 Frignaughts and get my D5W done and on the table. Stinking F5s just irritate the heck out of me with their shorter ranged disruptors and laughable phaser-1 array. Speaking of Silent Death, I need to get some X-Wing and TIE Fighter models to use the Star Wars variant of those rules. I've pretty much given up on the idea of finding suitable Zentraedi fighters to do a Macross battle.
I've gotten a little bit of painting done on the GZG High Tech Grav Tank. The turret and top half of the hull are base coated.
Here's a look at the rest of table with a few projects in progress and a few waiting to enter spacedock.
The game was a Federation vs. Klingon 1000pt game (I don't have any of my other SFU ships painted yet..it's only been about four years now). On the Fed side I had a Command Cruiser (CC) represented by the USS Constitution (I know, the Connie isn't a CC, but I don't have a proper CC and the other heavy cruiser doesn't have decals on it so it was the easiest way to distinguish), an as of yet to be named Heavy Cruiser (CA) that we'll imagine for now to be a certain ship that isn't to be named in the SFU, and two Old Light Cruisers (oCL). For the Klingons there were two of the iconic antagonists to the CA...the ever present D7 battlecruiser and two F5 frigates.
RAdm Micheal commanded the CC and an oCL and Capt Zachary commanded the CA and the other oCL. I commanded a D7 and an F5, whilst Phillip commanded the other pair. The first turn was closing and long range phaser-1 shots that amounted to minimal damage, though the CA did lose a number of weapons. Michael advanced his oCL while moving his CC only one hex forward. Zachary was a little more ambitious, moving forward as much as his ships would allow. Phillip, embracing his inner Klingon charged forward while I maneuvered around the edge for a little saber dancing. Phillip fired four drones and I added another one all targeted at the CC.
In the second turn Phillip charged head long into the oncoming cruisers which led to his brothers focusing fire on him. This led to one of the challenging aspects of playing with younger children who haven't developed a sense of sportsmanship yet. He got upset and stormed out because his brothers were obviously being unfair. Though to be honest, they weren't being very sportsmanlike either. This was addressed over the course of the next half hour before we could continue play.Michael advanced each of his ships one hex forward while Zachary cautiously advanced to within overload range. I continued to advance around the edge coming within overloaded disruptor range of Zachary's CA since he had already taken some damage. The drones were a few hexes outside of reaching the CC this turn. Phillip concentrated on Zachary's closer CA and I finished it off (despite some abysmal dice rolls on my part). Michael destroyed Phillip's F5 and put a hurt on his D7. My D7 weathered a few pot shots, but the F5 remained unscathed. In the end phase a new wave of was launched targeting Zachary's CA.
Turn three saw the continued rush of Phillip's D7, which didn't survive the turn. The The drones caused an amount of damage to be expected for five flights against an undamaged CC, though they did a good job of reducing the forward shields. The oCls continued to be pretty much ignored as killing the larger cruisers were sufficient to remove a player from the game from a victory condition point of view (destroy half or more of a player's total point value).
In turn four, I turned to get the CC into a broadside arc and Michael obliged by turning into a head on course to my ships, effectively crossing his own T...with severly depleted forward shields (they were at 1, meaning as long as I rolled a hit it was fairly certain to cause damage). The second wave of drones were spectacularly ineffective, and poor rolling on my part only barely destroyed the CC. However, it was a Pyrrhic victory as overloaded torpedoes rendered my D7 into so much space debris. Had we continued with the oCL and F5, the game would've gone to Michael as the F5 had lost too many weapons to cause any significant damage to the light cruiser. But victory conditions what they were, we called it a tie. (No photo, my chief of photography again ran off, I may need to request another person to fill the billet...)
Even using the simplified movement I think Starmada may be a bit overwhelming for the boys, especially Phillip, but they had fun. I think next time will be a three-way NSL vs FSE vs Mauridians in an effort to use some less complicated shielding rules. Or who knows, I might play a first game of Silent Death, having had that on the shelf for about two and half years now. One thing I do know is that I need to get some F6 Frignaughts and get my D5W done and on the table. Stinking F5s just irritate the heck out of me with their shorter ranged disruptors and laughable phaser-1 array. Speaking of Silent Death, I need to get some X-Wing and TIE Fighter models to use the Star Wars variant of those rules. I've pretty much given up on the idea of finding suitable Zentraedi fighters to do a Macross battle.
I've gotten a little bit of painting done on the GZG High Tech Grav Tank. The turret and top half of the hull are base coated.
Here's a look at the rest of table with a few projects in progress and a few waiting to enter spacedock.
Labels:
15mm,
ADB,
battle report,
Federation,
GZG,
Klingon,
Klingon Armada,
painting,
sci-fi,
tank,
WIP
20110225
Progress on the Felids
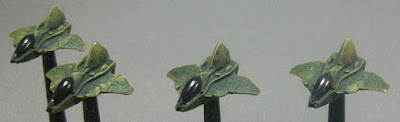
Have the armor base coated on all the Felids as of last night. Tried to take a picture, but the camera didn't want to play well with others, so I stopped bothering to get a WIP shot. The armor is Reaper MSP Pale Lichen, the fur will be Reaper ProPaint Fireball Orange (I think that's the name), and details in appropriate colors. I think the orange will be a nice contrast to the light green. Though the more I think about it, Pale Lichen is pretty close to the color of my service uniform shirts...
20090607
Some (much delayed) Photos
OK, I've been promising photos of stuff since the beginning of May so here goes...
(click for larger pics)
First up, reshoots of the Gladiator II, and Silent Death fighters I posted a while ago...
And a little mechenbooty...
and the reshoots of the Jambiya fighters
and the Djinns
And now for all the stuff I've been painting, almost all Silent Death fighters
Blizzards
Salamanders
Thunderbirds (no not those Thunderbirds)
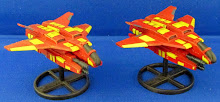
Pit Vipers
And some projects that have been severely derailed for one reason or another
First, a Centurion that was started last year, but the colors didn't come out right and I haven't been able to bring myself to fix it yet
Sarah the Seeress for my wife that got derailed by my being gone for three months
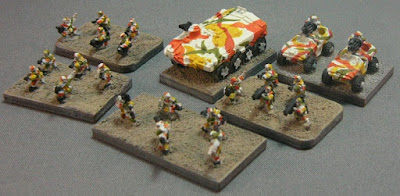
And some samples of what little progress was made on a 6mm force of DRM's Pax Arcadians, also derailed by my trips, the army was supposed to be done at the end of April.
enjoy!
(click for larger pics)
First up, reshoots of the Gladiator II, and Silent Death fighters I posted a while ago...
| From CAV |
| From CAV |
And a little mechenbooty...
| From CAV |
and the reshoots of the Jambiya fighters
| From Silent Death |
and the Djinns
| From Silent Death |
And now for all the stuff I've been painting, almost all Silent Death fighters
Blizzards
| From Silent Death |
Salamanders
| From Silent Death |
| From Silent Death |
Thunderbirds (no not those Thunderbirds)
| From Silent Death |
Pit Vipers
| From Silent Death |
| From Silent Death |
And some projects that have been severely derailed for one reason or another
First, a Centurion that was started last year, but the colors didn't come out right and I haven't been able to bring myself to fix it yet
| From WIPs |
Sarah the Seeress for my wife that got derailed by my being gone for three months
| From WIPs |
And some samples of what little progress was made on a 6mm force of DRM's Pax Arcadians, also derailed by my trips, the army was supposed to be done at the end of April.
| From WIPs |
enjoy!
Subscribe to:
Posts (Atom)